How to use Qt WebAssembly – The Complete Guide with demo
Hey, welcome back to another blog post. Today we’re going to talk about the new Qt WebAssembly. This post will […]

Join us at Qt C++ Warsaw Meetup - 21.08.2025
Sign up for free!
Whether your product is in its early stages or ready to launch, the iPhone platform is a compelling option to consider.
Expanding across multiple platforms can significantly boost your brand’s visibility, attracting a wider audience and ensuring your product gets noticed. This broader reach enhances your market analysis, providing deeper insights into user preferences and behaviors.
A multi-platform presence also strengthens your brand’s resilience by reducing dependency on a single ecosystem, ensuring stability in a rapidly changing tech landscape. The iOS platform offers features that enhance your product’s functionality and appeal. The App Store, ARKit, Apple Pay, Face ID, HealthKit, HomeKit, iCloud, Siri, and more are powerful tools to leverage.
As experts in cross-platform mobile development using Qt, we decided to share some of our insights after years of developing apps for iOS devices. This topic is shrouded in disrepute, and there are probably several reasons for this.
Why wouldn’t you? Qt is a powerful framework developed by Qt Group (previously The Qt Company) and the open-source community. It is perfect for developing applications of varying complexity. Qt is based on C++, allowing you to build anything from lightweight, straightforward apps to highly advanced, feature-rich software solutions.
Qt allows iOS development and building iOS application that would simply use native features. Qt allows you to leverage the power of C++ alongside Objective-C and Swift. Having Qt Creator and XCode installed, you can develop almost any iOS app which could be also run on Android. So just like Flutter or React Native, Qt is a cross-platform development environment. See our Flutter vs React Native vs Qt comparison.
Probably the most popular case to have a mobile app running on an iOS device is the need to have a companion app. Let’s say you do HMI development to have a screen to control your device. You might also want to have access to some data and to control the device in a limited scope from your iPhone.
But it is not the only case. Sometimes people want to develop a mobile app with Qt as they either already have skills in Qt QML development or they just want to benefit from what Qt has to offer regarding GUI development.
The source code of the Qt mobile app doesn’t differ that much from projects that target desktop (Windows, Linux), embedded, and other platforms. The majority of code is usually C++ and QML (for GUI). Of course, iOS and macOS apps using native features have to utilize Objective-C code. Thankfully, it’s not that difficult to implement that. Although, Objective-C code isn’t the prettiest and the most satisfying thing to write. Just like in the case of Android apps, to call native features, you have to call Java and here you have to call Objective-C.
Actually, at Scythe Studio we also integrate iOS apps with Swift – a newer iOS programming platform. It’s not that straightforward, but it’s still possible with a bit of magic and special mumbo-jumbo.
Please note that this article isn’t a tutorial per se. It’s more like a look at insights and realms of.
For the build system, the latest version of Qt recommends using CMake. It handles the complexities of compiling your project for iOS, ensuring a smooth build and execution process. In the CMakeLists.txt file – a place where you specify the project’s details and dependencies you have the possibility to configure some properties of the target. One of such thing is a path to a .plist file, but you can also specify other things that will then be used while building an app bundle.
qt_add_executable(app)
if(IOS)
    set_target_properties(app
        PROPERTIES MACOSX_BUNDLE_INFO_PLIST "${CMAKE_CURRENT_SOURCE_DIR}/ios/Info.plist")
endif()
It is a special file where you specify details of your app. It is an equivalent of Android Manifest file. So you can specify here app id, app’s display name, permissions, icons, horizontal/vertical orientations or whether the iPad will be supported.
This is how this file may look like.
<?xml version="1.0" encoding="UTF-8"?>
<!DOCTYPE plist PUBLIC "-//Apple//DTD PLIST 1.0//EN" "http://www.apple.com/DTDs/PropertyList-1.0.dtd">
<plist version="1.0">
<dict>
    <key>CFBundleIconFile</key>
    <string></string>
    <key>CFBundlePackageType</key>
    <string>APPL</string>
    <key>CFBundleGetInfoString</key>
    <string>Created by Qt/CMake</string>
    <key>CFBundleSignature</key>
    <string>????</string>
    <key>CFBundleExecutable</key>
    <string>example</string>
    <key>CFBundleIdentifier</key>
    <string>com.scythestudio.${PRODUCT_NAME}</string>
    <key>CFBundleDisplayName</key>
    <string>${PRODUCT_NAME}</string>
    <key>CFBundleName</key>
    <string>${PRODUCT_NAME}</string>
    <key>CFBundleShortVersionString</key>
    <string>1.0</string>
    <key>CFBundleVersion</key>
    <string>1.0</string>
</dict>
</plist>
Important: Fact that you base your project on Qt, doesn’t mean that you can’t use tools that you know from native iOS programming like CocoaPod. It is a package manager, that simplifies the integration of iOS-specific dependencies, providing access to the extensive ecosystem of native iOS features.
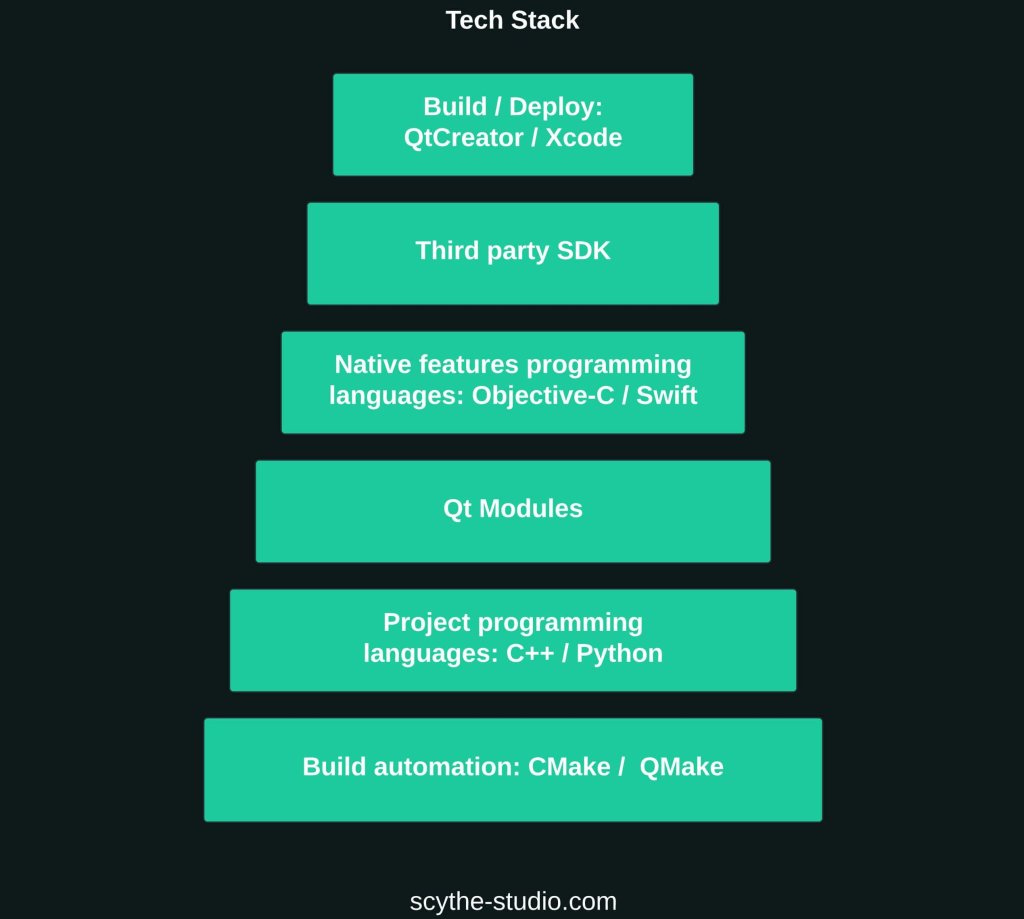
To start developing an iOS app with Qt, you’ll need to set up the right environment and gather a few essential tools. This includes a compatible operating system, the necessary development software, and the appropriate accounts and knowledge. These foundations are crucial for creating a seamless development experience and ensuring your app can be built, tested, and deployed effectively.
Developing an iOS app with Qt requires Apple’s exclusive development tools that are available only on macOS. Tools such as Xcode are essential for coding, testing, debugging, and the mandatory signing and distribution process for iOS apps. Apple’s App Store deploying process strictly requires Xcode to ensure that apps meet their security and functionality standards.
Developing iOS apps without Apple hardware is complex and technically demanding. Remote macOS services, CI/CD tools, and short-term rentals can work but require extra effort and caution. Ultimately, investing in Apple hardware simplifies the process and reduces the risk of issues or service term violations. At Scythe Studio, we don’t imagine developing software without the possibility to finally test whether everything works on the target device.
For testing, an iPhone isn’t strictly necessary, as Xcode includes a simulator. However, relying solely on simulators is not advisable for thorough testing. Simulators can catch many issues but cannot replicate all behaviors of real devices. Different error cases can emerge on various iPhone models due to hardware and software differences. Therefore, access to a range of real iPhones is beneficial to ensure your app performs well across different devices.
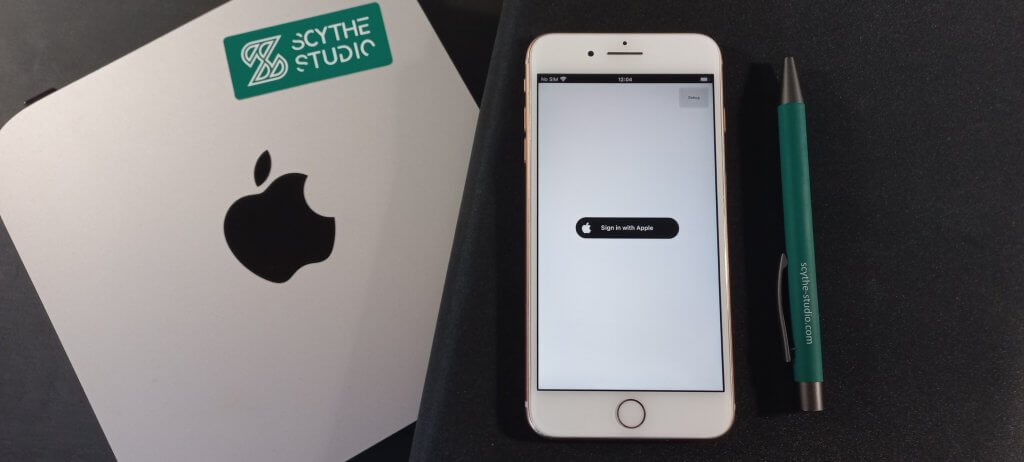 Mac Mini is a nice affordable option to start
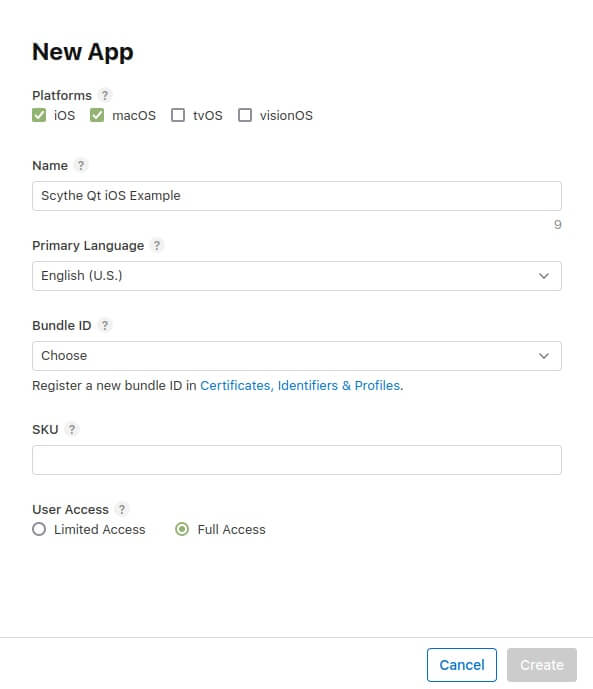
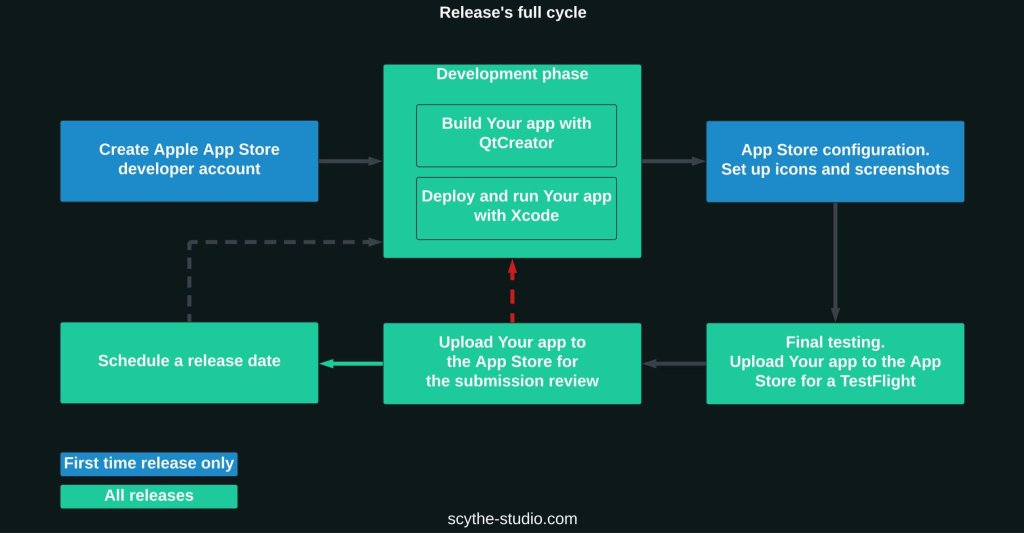
To release an app to the Apple App Store, you must first enroll in the Apple Developer Program to establish a developer account. This membership is crucial, as it grants access to essential tools, resources, and the App Store itself. It’s a cost of 100$ per year.
Access to App Store is also necessary to grant your developers access to app details and there you create new apps by setting Bundle ID and provisioning profiles.
The app development phase begins with Qt Creator – an editor for writing code, testing, and building the app. During the build process, tools included in the Qt Creator generate an Xcode project. Xcode, Apple’s IDE, enables developers to further configure the project to leverage native features and permissions or to continue development within the editor. In case you like this development environment, you can even use Xcode from the very beginning.
 XCode with Qt project open
Preparation for submission involves several steps like setting up a build target for the release. App bundle can be uploaded to Apple’s beta testing platform, TestFlight, for further checks. Developers must also prepare app screenshots, icons, and previews for all required device sizes.
The submission process begins by uploading the final build to App Store Connect through Xcode. Developers complete the submission by filling out various forms, including compliance information and configuration instructions. Finally, clicking the “Submit for Review” button sends the app to Apple’s review team.
The review process starts with an automated scan for common issues. Following this, an Apple reviewer manually examines the app to ensure compliance with Apple’s guidelines. If issues are found, feedback is provided detailing necessary changes.
Upon passing the review, the app may be approved, and the developer receives a notification.
If rejected, developers must review the feedback, make the required changes, and resubmit.
Once approved, developers can choose to release the app immediately or schedule a release date.
This phase also involves preparing and executing a marketing plan to promote the app’s launch effectively.
Post-release, it is essential to monitor the app’s performance and user feedback. Regular updates are necessary to fix bugs, add new features, and enhance the user experience. Analytics tools play a crucial role in tracking user engagement and other key metrics.
Sometimes we joke that doing some task for a client for whom we do iOS projects requires a prophylactic visit to a psychologist. Fortunately, it’s not that bad, but I got permission to complain a bit in this part of the article.
Some providers might require extra steps and standards before you can use their features. For example, big companies like Google, Facebook, or Apple often have specific design rules for size, shape, and color of buttons related to it’s features. If your app handles payments, you’ll need to boost security and make sure things like the Terms of Service are easy to find in your app.
Each provider might have its own documentation, approval processes, and compliance checks. You might also need to set up a developer account to access certain features or APIs. All these requirements, along with back-and-forth discussions with tech support, can add days to your development timeline.
Different companies have their own ways of integrating SDKs, and there are two main strategies they usually follow. The first is all about keeping things simple and easy, especially for beginners. Companies that go this route usually offer one specific way to link their SDK, making the process straightforward. But, if that specific method doesn’t fit your needs, you might find yourself stuck with limited options.
The second strategy is about giving developers more flexibility. These companies offer several ways to link the SDK, like using CocoaPods or integrating directly within Xcode, so you can choose what works best for you. While having options is great, it can also make things more complicated. Not every method will work perfectly right away. You might need to spend extra time troubleshooting and adapting.
No matter which integration strategy the company chooses. The real challenge often starts with automation. While getting an SDK to work initially is one thing, making sure it works consistently across every machine is a whole different story. Even if the build works fine on one machine, getting a new developer set up can still take days. Thus automation is key. Setting everything up from scratch with each build is an impossibly huge time sink.
Modifying a project in Xcode might seem easier, but if your Xcode project is generated by CMake, any changes you make will disappear after a rebuild. You can configure CMake to generate a well-set Xcode project, but that often requires careful adjustments.
The time you save by automating repetitive tasks and ensuring everything runs smoothly across different environments is invaluable. It lets developers focus on what really matters, making the workflow more efficient and productive.
Automating every part of your project setup is ideal, but it often requires a lot of time and technical skill. Each configuration and integration involves plenty of trial and error. The complexities of different Qt versions, development kits, and the ever-changing platforms and SDKs create a web of challenges.
Upgrading from one Qt version to another can bring a fresh batch of issues—like compatibility problems, API changes, or unexpected dependencies. Plus, with updates to operating systems, new SDK features, and changes to development tools, you’ll constantly have new problems to solve.
Keeping an iOS project running smoothly is a never-ending job that demands constant attention and a committed approach to maintaining stability and functionality.
If the last part felt grim and overwhelming, you need to check out the solutions below. How can we overcome these difficulties? In this section, we’ll explore top tips for developing an iOS app with Qt, turning obstacles into manageable tasks and ensuring a smoother development journey.
To successfully develop an iOS app with Qt, essential skills are required. Lacking these skills can turn what should be a straightforward task into a lengthy endeavor. Investing in experienced professionals might seem costly initially, but it pays off by avoiding significant delays and extra expenses.
Automating build phases with Xcode and CMake is critical for efficiency, as your team will frequently build the product. Expertise in these tools can streamline this process, as seasoned developers can quickly resolve common issues.
In addition to Xcode and CMake, proficiency in Objective-C and Swift is necessary for effective coding and integration. While basic knowledge of Objective-C is sufficient, a deeper understanding helps prevent crashes and bugs. Experience with these languages also contributes to better architecture design of your iOS app, minimizing the need for future revisions.
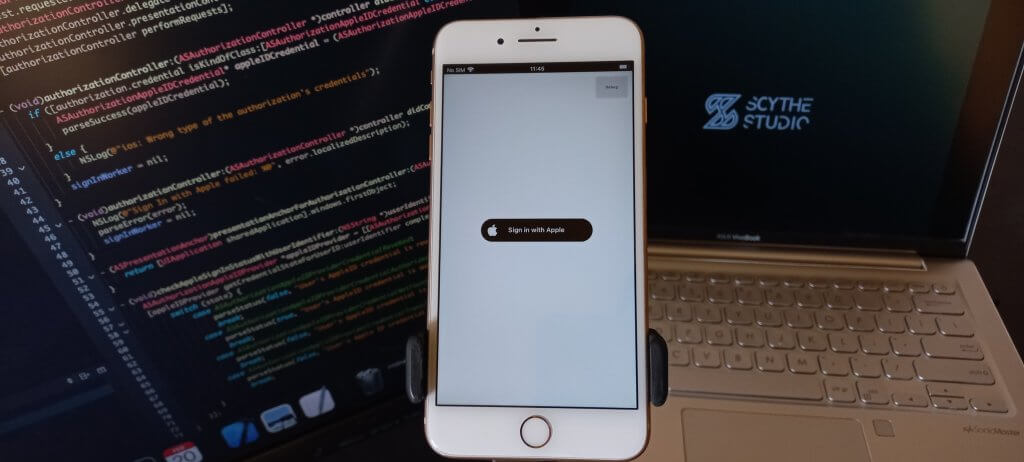
Familiarity with Apple’s features is also crucial for optimizing advanced functionalities. An expert’s insight into these features can uncover platform limitations and requirements that may not be obvious with basic integration.
 Example of iOS native feature in Qt app
Let me wrap up some last ideas that I found worth summarising.
Choosing between testing on a simulator or an actual device depends on your project’s needs. Testing on a real device is better because some bugs might not show up on a simulator. However, the iOS simulator in some cases can speed up the development process. You can use both, but it adds extra maintenance work. It’s important to ensure the chosen build option is consistently used. Otherwise, without any maintenance, it will be outdated within a month. The cost of bringing a build setup back is never zero.
Do you need more? Absolutely, you can never have too many iOS devices. Testing your app across different devices, versions, and SDKs is crucial for spotting and fixing device-specific bugs. Try to gather a variety of iPhones, both old and new models. If you can, invest in additional devices or use device rental services. This approach ensures thorough testing and boosts your app’s reliability across different devices.
No matter which solution you choose, it’s important to keep it consistent across your team. Using multiple approaches can add extra time for setup and maintenance, so it’s best to avoid unnecessary complexity. Keeping all team members on the same setup helps them face the same issues, which can reduce the number of problems you need to address.


Let's face it? It is a challenge to get top Qt QML developers on board. Help yourself and start the collaboration with Scythe Studio - real experts in Qt C++ framework.
Discover our capabilitiesHey, welcome back to another blog post. Today we’re going to talk about the new Qt WebAssembly. This post will […]
Users of embedded devices – from industrial controllers to consumer electronics – are often unaware of hidden vulnerabilities that threaten […]

Graphical user interfaces (GUIs) are becoming more and more important in embedded devices – from home appliances to medical equipment […]