
Secure Boot and Firmware Protection in Embedded Systems
Users of embedded devices – from industrial controllers to consumer electronics – are often unaware of hidden vulnerabilities that threaten […]

In the previous post about Deploying app and generating offline installers for Windows Qt Installer Framework, you learned the basics of the app deployment process and installer generation. However Qt Installer Framework offers much more than that! What more can you do with this tool? For example, you can customize an installer UI in many different ways and this is what you will learn in this post. Before going any further, let’s answer one important question. Why do that?
Look and feel of the app is just as important as performance and usability. This is no secret that users pay attention to the look of the software they are using – this is why frontend developer is as important role as backend one. This is also the reason to find out how to turn generic looking tool into user-friendly eye-candy. Before we do that, let’s start with the basics.
First, if you do not know Qt framework and what features it contains, check out our blog post about Qt and how to create GUIs using it.
Need help with your project? Check out our Qt development services.
There are few ways to customize your installer: creating component scripts, adding a control script or modifying config.xml file. You should already know the last position in this list from the previous blog post about Deploying app and generating offline installers for Windows Qt Installer Framework, so we will discuss it first.
Configuration file contains a set of XML tags which can modify installer behaviour and look. There are plenty of tags, so we will take a closer look only at a few of them. First, something easy – adding custom icon for the installer window and executable file.
To set window icon, all you need to do is to add InstallerWindowIcon tag containing name of the PNG file and place it in config folder. Adding custom icon for installer executable, looks almost the same, but in this case you use InstallerApplicationIcon tag. However the format of the file is system dependent, so it is a .icns for macOS and .ico in case of Windows. Sadly this tag is not supported on Unix. Name of the icon in InstallerApplicationIcon tag should omit file type, as the generator handles deciding what type of icon to use. Also remember that icons shouldn’t be too big – sometimes installer generator omits such icons. In case of Windows, 128×128 works fine for me. Using the configuration file from the previous post, after applying the mentioned changes its content should look as follows:
<?xml version="1.0" encoding="UTF-8"?>
<Installer>
    <Name>APP NAME</Name>
    <Version>1.0.0</Version>
    <Title>INSTALLER WINDOW TITLE</Title>
    <Publisher>Scythe Studio</Publisher>
    <StartMenuDir>START_MENU_DIR</StartMenuDir>
    <TargetDir>@HomeDir@/APP_DIR</TargetDir>
    <InstallerWindowIcon>logo.png</InstallerWindowIcon>
    <InstallerApplicationIcon>installericon</InstallerApplicationIcon>
</Installer>
After generating the new installer file for Windows, we should see that everything works as expected:
Now you have some custom icons, but the installer still looks quite generic. What you can do with the config file to change that? The answer is – add some style sheets!
Qt Style Sheets is a tool from Qt Widgets module that is used to customize the appearance of widgets. The concepts, terminology, and syntax are heavily inspired by HTML Cascading Style Sheets (CSS) but adapted to the world of widgets. It is also very similar to QML syntax. As the Qt Installer Framework is based on the Qt Widgets module, we can also use style sheets to modify the appearance of installers.
To add style sheet to your installer, simply create style.qss file in config directory and add StyleSheet tag to config.xml. You can also add one additional tag to make things even better – WizardStyle. This tag changes the layout of the installer. I suggest going with “Modern” style, as in case of Windows it will get rid of white border around content of installer which will be annoying at this point of customization. Now config.xml should look similar to code below:
<?xml version="1.0" encoding="UTF-8"?>
<Installer>
    <Name>APP NAME</Name>
    <Version>1.0.0</Version>
    <Title>Qt Installer Tutorial</Title>
    <Publisher>Scythe Studio</Publisher>
    <StartMenuDir>START_MENU_DIR</StartMenuDir>
    <TargetDir>@HomeDir@/APP_DIR</TargetDir>
    <InstallerWindowIcon>logo.png</InstallerWindowIcon>
    <InstallerApplicationIcon>installericon</InstallerApplicationIcon>
    <WizardStyle>Modern</WizardStyle>
    <StyleSheet>style.qss</StyleSheet>
</Installer>
Style sheet provided in config directory is empty, so it won’t change anything. Open the style.qss file and you can change almost any part of the appearance – how to do that? Like in case of CSS you declare a scope (or in this case a widget) that is supposed to be customized. For example if you want to change window background, you create QWidget scope, just like that:
QWidget
{
    color: white;
    background-color: rgb(61, 56, 56);
}
What about adding some more color to installer? Let’s use our favourite green shade and radius property to make buttons stand out more.
QPushButton
{
    background-color: rgb(36, 159, 123);
    border-style: solid;
    border-width: 1px;
    border-color: rgb(61, 56, 56);
    border-radius: 5px;
}
You can also add state dependent styling. In case of button, we can change its color to some linear gradient when it is pressed or checked.
QPushButton:pressed, QPushButton:checked
{
    background: qlineargradient(x1:0, y1:0, x2:1, y2:0, stop:0 rgba(36, 159, 123, 60%), stop:1 rgba(19, 85, 64, 60%));
}
There are plenty of ways to modify each widget, so we will not discuss every option here. If you want to learn more about style sheets see the documentation page dedicated to Qt Style Sheets and the one containing examples of customization of each item. With some other minor modifications style.qss contain following code:
QWidget
{
    color: white;
    background-color: rgb(61, 56, 56);
}

QPushButton
{
    background-color: rgb(36, 159, 123);
    border-style: solid;
    border-width: 1px;
    border-color: rgb(61, 56, 56);
    border-radius: 5px;
    min-height: 25px;
    max-height: 25px;
    min-width: 60px;
    padding-left: 15px;
    padding-right: 15px;
}

QPushButton:pressed, QPushButton:checked
{
    background: qlineargradient(x1:0, y1:0, x2:1, y2:0, stop:0 rgba(36, 159, 123, 60%), stop:1 rgba(19, 85, 64, 60%));
}

QProgressBar
{
    text-align: center;
}

QProgressBar::chunk
{
    background-color: qlineargradient(x1:0, y1:0, x2:1, y2:0, stop:0 rgba(36, 159, 123, 60%), stop:1 rgba(19, 85, 64, 60%));
}
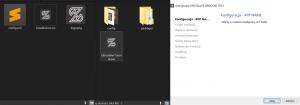
With this style sheet applied installer should look like this:

Notice that changes in appearance don’t affect only an installer, but also maintenance tool:

This is already some major change, but we are not done yet. What else you can do to push things event further? What about adding some custom pages using scripts?
We haven’t touched the topic of Scripting API, from Qt Installer Framework yet, so at the beginning let’s explain what this is.
It is basically set of JavaSctipt objects that you can use to create scripts, which are placed in .qs files executed by QJSEngine. You can use them to interact with certain parts of the installer’s UI or its functionality. In the case of installers there are two types of scripts: controller scripts and component scripts. In this entry we will focus on component scripts, while controller type will be covered in detail in the next entry. Component scripts are used to handle behaviour for selected component in the installer, so each component can have its own script.
Before going any further with scripting you need to create your page and register the .ui file first. Now create your own widget class in .ui file. As an example we will use CustomPage class containing following code:
<?xml version="1.0" encoding="UTF-8"?>
<ui version="4.0">
<class>CustomClass</class>
<widget class="QWidget" name="MyPage">
<property name="geometry">
<rect>
<x>0</x>
<y>0</y>
<width>532</width>
<height>300</height>
</rect>
</property>
<property name="windowTitle">
<string>Custom Page</string>
</property>
<layout class="QHBoxLayout" name="horizontalLayout">
<item>
<layout class="QVBoxLayout" name="verticalLayout">
<item>
<widget class="QRadioButton" name="radioButton">
<property name="locale">
<locale language="English" country="UnitedStates"/>
</property>
<property name="text">
<string>OptionA</string>
</property>
</widget>
</item>
<item>
<widget class="QRadioButton" name="radioButton_2">
<property name="locale">
<locale language="English" country="UnitedStates"/>
</property>
<property name="text">
<string>Option B</string>
</property>
</widget>
</item>
<item>
<widget class="QRadioButton" name="radioButton_3">
<property name="locale">
<locale language="English" country="UnitedStates"/>
</property>
<property name="text">
<string>Option C</string>
</property>
</widget>
</item>
</layout>
</item>
<item>
<widget class="Line" name="line">
<property name="orientation">
<enum>Qt::Vertical</enum>
</property>
</widget>
</item>
<item>
<widget class="QTextBrowser" name="textBrowser">
<property name="html">
<string><!DOCTYPE HTML PUBLIC "-//W3C//DTD HTML 4.0//EN" "http://www.w3.org/TR/REC-html40/strict.dtd">
<html><head><meta name="qrichtext" content="1" /><style type="text/css">
p, li { white-space: pre-wrap; }
</style></head><body style=" font-family:'MS Shell Dlg 2'; font-size:7.8pt; font-weight:400; font-style:normal;">
<h3 style=" margin-top:14px; margin-bottom:12px; margin-left:0px; margin-right:0px; -qt-block-indent:0; text-indent:0px;"><span style=" font-size:large; font-weight:600;">Who are we?</span></h3>
<h4 style=" margin-top:12px; margin-bottom:12px; margin-left:0px; margin-right:0px; -qt-block-indent:0; text-indent:0px;"><span style=" font-size:medium; font-weight:600;">We are group of software enthusiasts for whom your satisfaction is the most important.</span></h4>
<h4 style=" margin-top:12px; margin-bottom:12px; margin-left:0px; margin-right:0px; -qt-block-indent:0; text-indent:0px;"><span style=" font-size:medium; font-weight:600;">Our goal is to provide only high quality software which means that we want create easily managed, well documented and effortlessly maintainable software. We work in our productive scheme which is always additionally adjusted by specification of your project. We believe that there is nothing impossible in the case of software development.</span></h4></body></html></string>
</property>
</widget>
</item>
</layout>
</widget>
<resources/>
<connections/>
</ui>

For purpose of page register process we will use qtinstallertutorialx64 package, created in previous post. To add custom page inside package.xml file you have to add UserInterfaces tag containing list of UserInterface tags where each hold name of the file to register. Don’t forget to place registered .ui files inside meta folder! Such a list of files should look similar to this:
<UserInterfaces>
 <UserInterface>CustomPage.ui</UserInterface>
</UserInterfaces>
In order to add a first script to your installer you need to add Script tag, containing name of the .qs file, to package.xml file. Different scripts can be added to every package in your installer. At this point package.xml content should be following:
<?xml version="1.0" encoding="UTF-8"?>
<Package>
    <DisplayName>PACKAGE NAME 64-bit</DisplayName>
    <Description>This is going to install APP NAME on your machine</Description>
    <Version>1.0.0</Version>
    <ReleaseDate>2020-06-17</ReleaseDate>
    <Licenses>
        <License name="LICENSE TITLE" file="license.txt" />
    </Licenses>
    <Default>true</Default>
    <Script>installscript.qs</Script>
    <UserInterfaces>
        <UserInterface>CustomPage.ui</UserInterface>
    </UserInterfaces>
</Package>
Now you can begin writing the script. The script has to contain a Component object that the installer creates when it loads the script. To add a single custom page, script containing only a Component() function would be enough. To achieve this you have to use addWizardPage function called from installer global object. Take a look at the code of the final script:
function Component()
{
    installer.addWizardPage(component, "CustomPage", QInstaller.ReadyForInstallation);
}
Function that adds new page takes three parameters. First is the component which contains the registered name of the widget class you want to add – in this case a global component object referencing the current Component was passed. Next argument is the name of the registered widget class you want to use. Last is the index of the existing page before which new page will be placed. In this case CustomPage would be placed before ReadyForInstallation page.
Notice that name passed in addWizardPage function have to be the same as name of the root widget object created in .ui file and does not correspond with the .ui file name! For example if you change name of the widget object in CustomPage.ui file to MyOtherPage, you have to pass “MyOtherPage” to addWizardPage, although the name of the file in UserInterface tag remains the same.
<widget class="QWidget" name="MyOtherPage">
function Component()
{
    installer.addWizardPage(component, "MyOtherPage", QInstaller.ReadyForInstallation);
}
At this point we won’t be adding more functions or connect any signal and slots, as this will be covered in detail in the next entry of this series. After generating and running the new installer, you can see the results of the attached script:

As you already guessed my system language is not English, so default elements of the installer are translated, while the custom ones are not. To fix that Qt Translation system can be used.
Everything begins with preparing strings for translation. If you created your .ui file using Qt Creator and you want to translate only strings from this file, you don’t need to do anything in this step. However if you want to translate any of the strings from your installer script, don’t forget about wrapping them in qsTr() function.
At first place you need to generate a translation source file. It can be done using lupdate with -ts flag. At the beginning you pass files that need to be translated and at the end you enter language code that indicates translation language. To generate polish translation source file command should look as follows:
lupdate installscript.qs CustomPage.ui -ts pl.ts
As installscript.qs doesn’t contain any strings to translate, so it can be skipped in this case. However I wanted to leave it there, just so you won’t forget about it.
After running command, the .ts file is generated, so you can begin created translation using Linguist tool. It is software used for translating .ts files and generating binary Qt messages files, provided with Qt.

After you finished translating all strings you can use File->Release option in Linguist to generate the Qt messages file needed in further steps. You can also use the command line and use the following command:
lrelase pl.ts
In both cases you should get .qm file containing your translation in binary format. Now make sure it is in the meta directory. As a final step add a list of translations inside package.xml using the following tags:
<Translations>
        <Translation>pl.qm</Translation>
</Translations>
As you see, you can add more translations by simply adding more Translation tags. At the end package.xml should look similar to this code:
<?xml version="1.0" encoding="UTF-8"?>
<Package>
    <DisplayName>PACKAGE NAME 64-bit</DisplayName>
    <Description>This is going to install APP NAME on your machine</Description>
    <Version>1.0.0</Version>
    <ReleaseDate>2020-06-17</ReleaseDate>
    <Licenses>
        <License name="LICENSE TITLE" file="license.txt" />
    </Licenses>
    <Default>true</Default>
    <Script>installscript.qs</Script>
    <UserInterfaces>
        <UserInterface>CustomPage.ui</UserInterface>
    </UserInterfaces>
    <Translations>
        <Translation>pl.qm</Translation>
    </Translations>
</Package>
After adding translation and generating a new installer, you can see the results:

With this entry you learned how to customize the installer UI. The installer appearance is now your oyster. However this is not the end of this tutorial. In the next post, you will learn more about using scripts and handling custom behaviour of your installer. See you soon!


Let's face it? It is a challenge to get top Qt QML developers on board. Help yourself and start the collaboration with Scythe Studio - real experts in Qt C++ framework.
Discover our capabilitiesUsers of embedded devices – from industrial controllers to consumer electronics – are often unaware of hidden vulnerabilities that threaten […]

Graphical user interfaces (GUIs) are becoming more and more important in embedded devices – from home appliances to medical equipment […]

Technical managers in the embedded space often face a classic challenge: integrating industrial communication protocols into modern applications. One such […]
