Cybersecurity for Embedded Systems
From medical devices and smart vehicles to industrial controllers and consumer electronics, embedded systems are everywhere—and increasingly connected. But with […]

Join us at Qt C++ Warsaw Meetup - 21.08.2025
Sign up for free!
Qt and QML provide a powerful framework for developing modern, cross-platform applications with a sleek and responsive UI. While Qt Creator is the default IDE for Qt development, many developers prefer Visual Studio Code (VS Code) due to its lightweight nature, flexibility, and rich extension ecosystem.
However, setting up Qt and Qt Quick in VS Code requires some additional configuration compared to using Qt Creator. From installing the necessary tools and extensions to setting up CMake, IntelliSense, and build/debug configurations, there are a few key steps to ensure a smooth development experience.
In this guide, we’ll walk through the process of integrating Qt and QML with VS Code, covering:
Whether you’re an experienced Qt developer looking for an alternative to Qt Creator or a newcomer exploring Qt with VS Code, this tutorial will provide everything you need to start efficiently.
WSL (Windows Subsystem for Linux) is a compatibility layer that allows you to run a Linux distribution natively on Windows without the need for a virtual machine or dual-boot setup. It provides a Linux-compatible environment where you can execute Linux commands, run scripts, and even install full Linux distributions like Ubuntu, Debian, or Arch directly from the Microsoft Store.
There are two versions of WSL:
Using Qt, C++, and Docker, WSL can be useful for running Linux-based development tools directly on Windows. It also allows you to build and test software in a Linux environment without leaving Windows.
WSL can be installed via the Microsoft Store. First, open the Microsoft Store app on your Windows system, and inside the Store search for WSL. In the store, you can find various distributions of WSLs, like:
And even others, up to your preferences.
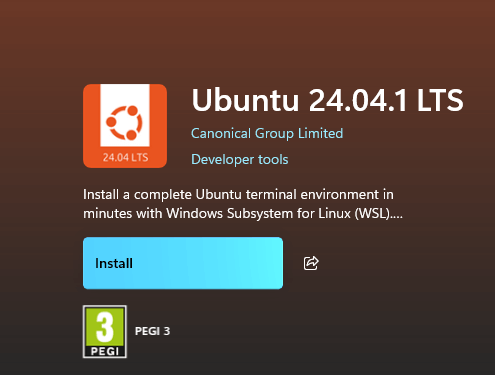
In this tutorial, we will continue with Ubuntu as it is the most popular one and is commonly used in software development. As you can see after searching for WSL in the Microsoft Store, the top 3 positions are Ubuntu distributions. I already have Ubuntu 22.04 set up, but let’s start from scratch and proceed with Ubuntu 24.04.

Open the Ubuntu 24.04 page and click Get, Windows will automatically install it on your system.
Once installed, open it and configure your username and password for sudoer.
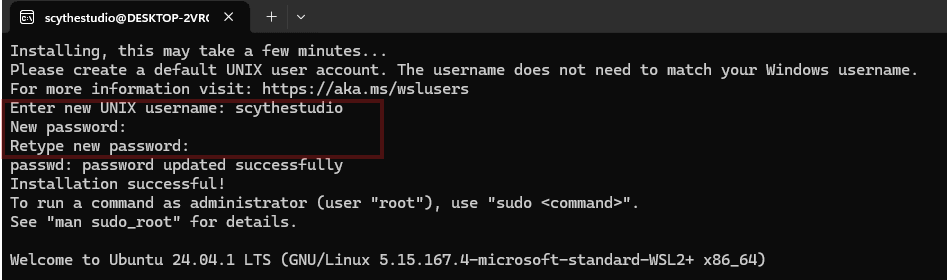
After the setup, we are ready to go and can start setting up our Qt Quick application development.
There are a few ways of installing Qt on WSL, you can build it from source if you have some spare time, or download binaries from the official Qt site.
To get the latest installer, head to https://www.qt.io/download-qt-installer-oss and select the Linux x64 variant.
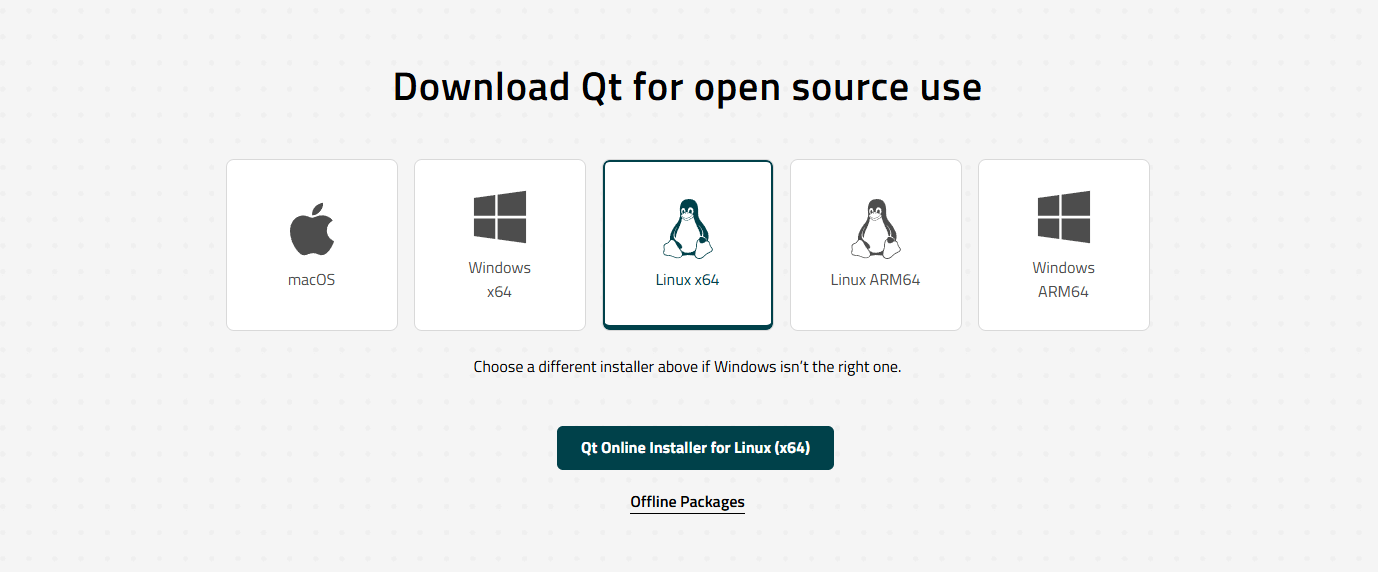
We can download the installer manually to your Windows host, then copy it to the WSL directory, or download it directly via terminal using wget. I will follow with terminal downloading as I am not much of a fan of manual copying files between WSL and Windows.
To get the download link, right-click on the button “Qt online installer for Linux (x64)” and select “Copy link address”. Now the direct link to the package is copied to your clipboard. Head into your WSL terminal and run the following command:
wget COPIED_LINK
Paste your link in the COPIED_LINK placeholder and hit enter. Now the qt-installer will be downloaded to your current directory. By default, it is a /home/%USERNAME,% also referred to as ~.

To run the installer, we need to give it execution permission. To do so, run a `chmod +x` command on the installer. In my case, it looks like this:
sudo chmod +x ./qt-online-installer-linux-x64-4.8.1.run
With the latest release 4.8 of the installer, we are able to use aliases to download ready Qt package sets. This package contains the following dependencies:
essential module libraries
essential module headers
essential module private headers
essential module runtime tools
essential module development tools
It still installs Qt Creator, but you are free to remove it manually after installation.
The latest release of Qt is 6.8.2, so I will be installing this version. By default, it will install Qt in the directory you are running the script from, which is home in our case. I personally like installing Qt in /opt, so I will need to add one more argument to our installation command to change the installation path. Note that installation in /opt requires running the command as sudo; it is not necessary if you want to install binaries in your home directory.
sudo ./qt-online-installer-linux-x64-4.8.1.run --root /opt/Qt install qt6.8.2-essentials-dev
If you want to read more about available options, check out the Qt docs https://doc.qt.io/qt-6/get-and-install-qt-cli.html
During the installation, you may encounter an error that the installer is missing libxkcommon dependencies
./qt-online-installer-linux-x64-4.8.1.run: error while loading shared libraries: libxkbcommon-x11.so.0: cannot open shared object file: No such file or directory
To install the dependencies, just run the following command:
sudo apt install libxcb*-dev
Once you have all the dependencies, we can run the installer. The installer is interactive, so once you run it, it will guide you through the process. You will have to log in to your Qt account, agree on the licensing, etc.
At the very beginning, you will have to log in using your Qt account. Once logged in, the installation will proceed and prompt you to accept the licensing.
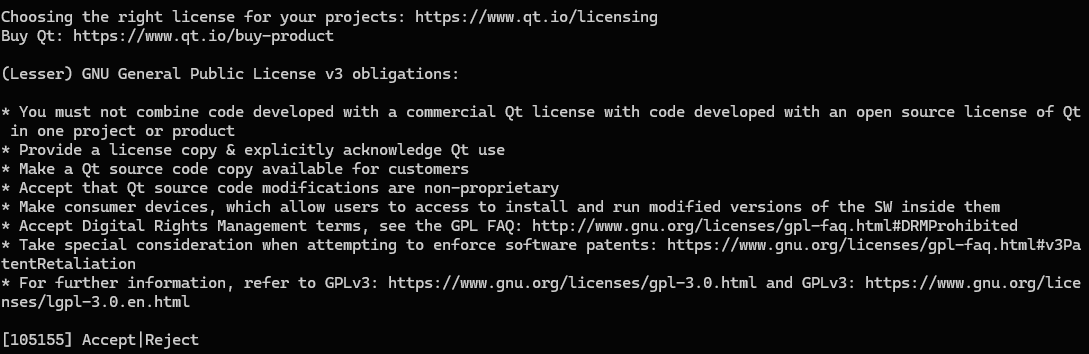
If you are not sure which license you are about to use in your project, we have a separate article about that and even offer training on this topic. You can check out our article on the Qt license.
You will see the following information once installation is done.

For now, we have installed Qt with Qt Quick in our system, but to start development, we also need to install additional dependencies. Those are listed on the official Qt site https://doc.qt.io/qt-6/linux.html
We need to install build-essential and libgl1-mesa-dev. To do so, run the following commands in your terminal
sudo apt update
sudo apt install build-essential libgl1-mesa-dev cmake ninja-build
If you try to run Visual Studio Code in any directory, it will automatically install it within WSL, set up a WSL connection, and open on your Windows host. To do so, run the code command in any directory.
code
This will install the Visual Studio Code server inside WSL.
Before starting the development, I recommend installing a few extensions in Visual Studio Code.
This extension helps developers configure, build, and manage CMake-based projects directly within VS Code. Since we use CMake to build Qt and C++ applications, this extension simplifies the workflow.
With this extension, we get:
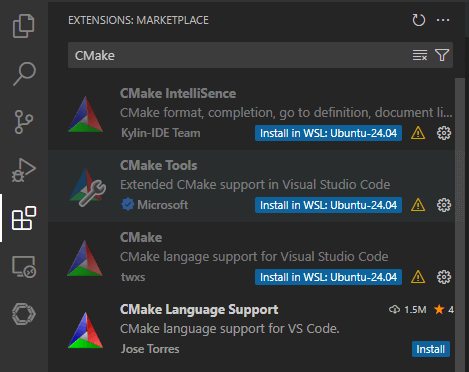
This also adds a nice bottom bar that lets us configure, build, and run the app quickly.

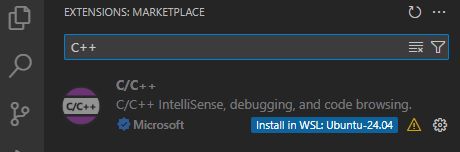
This extension provides essential features for C and C++ development. This adds the following features:
This is a collection of extensions designed to improve the development experience for Qt applications in VS Code. Makes the environment even better, especially for working on Qt Quick applications.
This installs the following extensions at once:
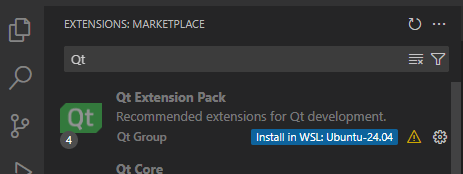
All of the modules above also add support for the Qt documentation.
On this stage, we have a development environment prepared for the Qt Quick application development. Let’s create a simple QML app.
I created a directory for my project in the home directory using the command line.
mkdir ~/QtInWSL
cd QtInWSL
To open the project in Visual Studio Code, simply run the command `code` pointing to your project directory.
code .
We also need to create a directory named “.vscode” inside the project directory. In this folder, VSC stores the configuration for a specific project.
To be able to run the app, we need to tell CMake where to look for Qt binaries. Let’s create a file named `settings.json` in the .vscode directory and specify a CMAKE_PREFIX_PATH.
{
    "cmake.configureSettings": {
        "CMAKE_PREFIX_PATH": "/opt/Qt/6.8.2/gcc_64",
    },
}
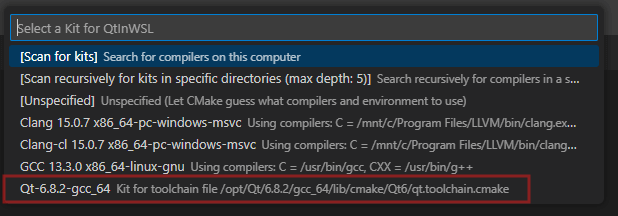
We also need to select a kit used for building the application.
Run CTRL + SHIFT + P inside Visual Studio Code to run a Command Palette and search for “CMake: Select a kit”. If the Qt kit does not appear on the list, select search for kits and select a path with your installation.
As we pointed out, we are using Qt 6.8.2, so we select such a kit from the list.
The basic project consists of the CMakeLists.txt file, a main.cpp file and a qml file that will be our GUI entry point (e.g., Main.qml).
Once the files are created, we can put some content into them.
Below you can find the code I used for this blog post.
CMakeLists.txt
cmake_minimum_required(VERSION 3.16)

project(QtInWSL VERSION 0.1 LANGUAGES CXX)

set(CMAKE_CXX_STANDARD_REQUIRED ON)

find_package(Qt6 REQUIRED COMPONENTS Quick)

qt_standard_project_setup(REQUIRES 6.8.2)

qt_add_executable(appQtInWSL
    main.cpp
)

qt_add_qml_module(appQtInWSL
    URI QtInWSL
    VERSION 1.0
    QML_FILES
        Main.qml
)

target_link_libraries(appQtInWSL
    PRIVATE Qt6::Quick
)

include(GNUInstallDirs)
install(TARGETS appQtInWSL
    BUNDLE DESTINATION .
    LIBRARY DESTINATION ${CMAKE_INSTALL_LIBDIR}
    RUNTIME DESTINATION ${CMAKE_INSTALL_BINDIR}
)
main.cpp
#include#include int main(int argc, char *argv[]) { QGuiApplication app(argc, argv); QQmlApplicationEngine engine; QObject::connect(&engine, &QQmlApplicationEngine::objectCreationFailed, &app, []() { QCoreApplication::exit(-1); }, Qt::QueuedConnection); engine.loadFromModule("QtInWSL", "Main"); return app.exec(); }
Main.qml
import QtQuick

Window {
   width: 640
   height: 480
   visible: true
   color: "#09100f"
   title: qsTr("Hello World")

   Text {
      anchors.centerIn: parent
      font {
         pixelSize: 24
         bold: true
      }
      color: "white"
      text: "Hello from Scythe Studio"
   }
}
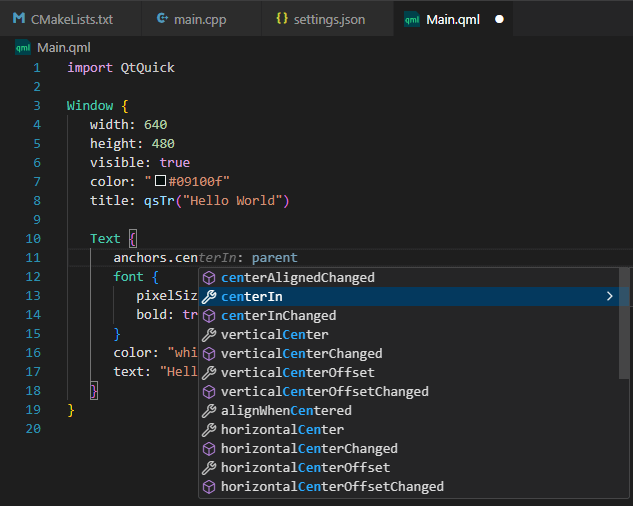
Also, with such a setup, everything is fully recognized with proper QML syntax highlighting and autocompletion
Once the app is built and running, we can see the output 🙂

When developing Qt applications, two popular choices for an integrated development environment (IDE) are Qt Creator and Visual Studio Code (VSC). While both are excellent options, they cater to different needs. We’ll compare the two and discuss why Visual Studio Code is a great choice for Qt QML development on WSL.
| Qt Creator | Visual Studio Code | |
|---|---|---|
| Qt Support | Built-in Qt tooling, QML designer, and debugger | Requires manual setup with extensions |
| Lightweight | More resource-intensive | Lightweight and runs smoothly in WSL |
| CMake Integration | Native support for CMake&qmake | CMake Tools extension required |
| Debugging | Integrated Qt debugger with QML support | GDB-based debugging via WSL |
| Version Control | Basic Git integration | Advanced Git features with extensions |
| WSL Compatibility | Can run in WSL but requires GUI forwarding | Natively supports WSL via Remote-WSL extension |

While Qt Creator is an excellent choice for Qt development, Visual Studio Code is better suited for WSL-based workflows due to the following reasons:
While VSC is a great choice for many developers, Qt Creator might still be preferable if:
Once your Qt QML development environment is set up in WSL and Visual Studio Code, the next step is mastering the essential Qt tools that streamline development, debugging, and deployment. Qt provides a rich set of tools that help with UI design, performance optimization, and troubleshooting. This chapter will cover the most important Qt development tools and how to use them effectively in a WSL-based setup.
This blog post covers the process of setting up Visual Studio Code for Qt development in a Windows Subsystem for Linux (WSL) environment. The integration enables developers to leverage the power of Qt for cross-platform development while maintaining a seamless workflow within a Linux-like environment on Windows.
By following this guide, you can harness the full power of Qt for building and deploying applications while enjoying the advantages of VS Code’s flexibility and the Linux-based environment provided by WSL.


Let's face it? It is a challenge to get top Qt QML developers on board. Help yourself and start the collaboration with Scythe Studio - real experts in Qt C++ framework.
Discover our capabilitiesFrom medical devices and smart vehicles to industrial controllers and consumer electronics, embedded systems are everywhere—and increasingly connected. But with […]
Hey, welcome back to another blog post. Today we’re going to talk about the new Qt WebAssembly. This post will […]

Users of embedded devices – from industrial controllers to consumer electronics – are often unaware of hidden vulnerabilities that threaten […]